Elevate Your Food Photography with Expert Food Stacking Techniques
What is the primary aim of food stacking in photography?
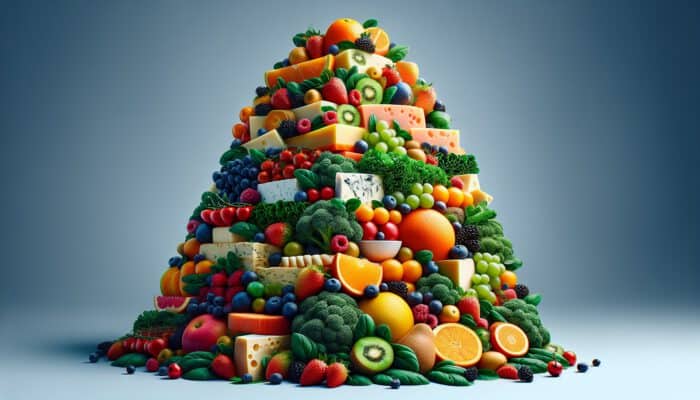
The primary aim of food stacking is to craft visually stunning arrangements that capture attention and significantly enhance the overall photographic allure. This artistic technique involves layering ingredients meticulously to achieve an ideal balance of height and stability, making your images more appealing and engaging. Stacking food not only highlights the unique characteristics of each ingredient but also adds depth and dimension to your compositions, making them more enticing for viewers. By introducing height into your presentations, you create visual intrigue that draws the eye, encouraging viewers to explore the composition further. This accessible technique allows even novices in food photography to experiment and produce stunning images perfect for sharing across various social media platforms.
Essential Principles for Mastering the Art of Effective Food Stacking
To excel in the art of food stacking, it is vital to understand fundamental principles such as proportion and stability. These elements form the foundation for achieving visually pleasing results. Proportion involves the careful selection of ingredients that differ in size and shape, contributing to an inviting and balanced aesthetic. For example, pairing a substantial item, such as a hearty slice of bread, with smaller components like herbs or toppings creates an engaging visual hierarchy. Stability is critical to ensure that your stack remains upright, which is essential not just for aesthetics but also for practicality. By concentrating on these principles, you will create food stacks that are both visually attractive and functional, elevating your photography to new heights.
To build layers that truly stand out, start with a solid base using heavier ingredients at the bottom. This foundational layer provides the necessary support for lighter items placed on top, preventing the stack from collapsing. Pay meticulous attention to colour contrast and texture; for instance, pairing a bright yellow mango cube with a slice of dark chocolate cake creates a striking visual contrast. By adhering to these essential principles, you can effortlessly achieve professional-looking results that elevate your food photography to exceptional standards, making your images not only appealing but also memorable.
What common pitfalls should you avoid when stacking food?
- Uneven layers can lead to instability.
- Overloading stacks results in visual chaos.
- Neglecting colour contrast diminishes overall appeal.
- Ignoring height can lead to flat presentations.
- Inadequate support for delicate items may cause collapse.
- Using mismatched textures can confuse the viewer’s eye.
- Failing to clean spills or smudges detracts from photo quality.
Avoiding these common pitfalls is essential for creating stunning food images. Begin by ensuring that all layers are even and stable, allowing your stack to stand tall without wobbling. Monitor your overall composition; overcrowding with excessive items can create clutter, resulting in visual chaos. Always consider the arrangement's height to maintain interest while inviting viewers to take a closer look. Lastly, a clean presentation significantly boosts appeal, ensuring your stack looks as appetising as it truly is, enhancing the overall impact of your photography.
Must-Have Tools to Create Stunning Food Stacks
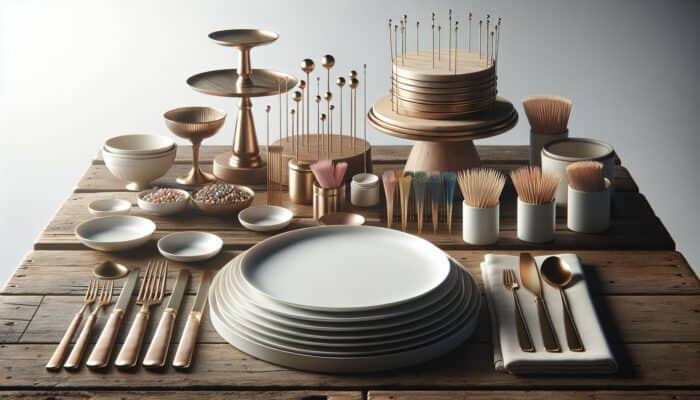
To achieve remarkable food stacks, possessing the right tools and materials is essential. Key items include various types of plates and stands that provide stability and elevate your dish, rendering it visually striking. A flat, sturdy plate serves as a reliable base, while tiered stands can significantly add height and dimension to your arrangements, enhancing their visual impact. Furthermore, small items like toothpicks can be invaluable for securing delicate layers, ensuring they remain in place during photography and do not compromise your artistic vision.
Investing in a set of tweezers can greatly enhance your food stacking efforts, allowing for precise placement of small garnishes. These tools enable you to create intricate designs without disturbing the stability of your stack. Additionally, consider using stabilisers such as small rocks or weights discreetly hidden beneath layers to improve overall balance. By emphasising these practical tools, you facilitate the stacking process, making it more accessible and enjoyable, empowering newcomers to confidently explore their creativity in food photography and achieve impressive results.
Step-by-Step Guide for Beginners to Craft Beautiful Food Stacks
To construct your first food stack, begin by carefully selecting your ingredients. Opt for items that harmonise in colour, shape, and texture. Once you've chosen your components, start with a sturdy foundation—this could be a slice of bread, a pancake, or any solid base that provides stability. Layer your initial item directly onto the foundation, ensuring it is centred for optimal support and visual appeal.
Continue layering with additional ingredients, varying shapes and sizes to create visual intrigue. For instance, when using fruit, alternate between slices and whole pieces to add height while maintaining balance in your stack. If necessary, secure delicate items with toothpicks to prevent them from tipping over during the stacking process. Throughout the creative journey, step back periodically to assess your stack's overall appearance, making any necessary adjustments to keep it visually appealing. Finally, tidy up any spills or smudges to ensure that when you photograph your stack, it appears polished and ready for close-ups, showcasing your artistic talent.
How to Choose the Best Ingredients for Stacking?
What key factors should you consider when selecting ingredients?
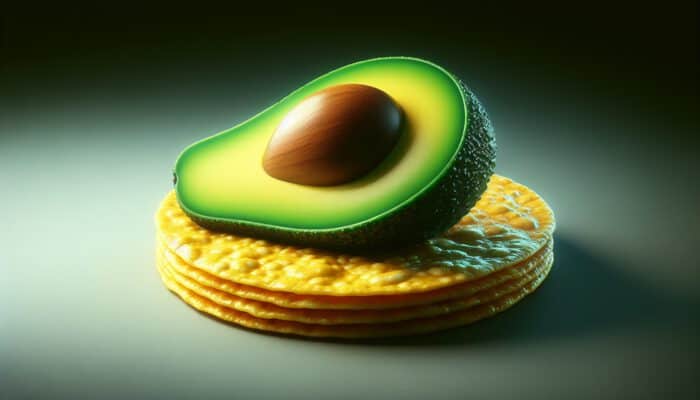
When selecting ingredients for your food stack, several critical factors significantly influence your choices, including colour, <a href="https://limitsofstrategy.com/wax-for-textured-styles-mastering-the-art-of-perfect-looks/">texture</a>, and shape. These elements work in harmony to create visual interest without overwhelming the composition. Strong colour contrasts can draw attention, while harmonious colours can evoke a sense of calm and balance. For example, a vibrant green avocado against a golden corn tortilla creates a visually striking statement that captivates the eye and enhances the overall appeal of your food stack.
Texture adds another layer of intrigue; combining smooth and crunchy items can produce a delightful contrast. For instance, layering creamy dips with crispy chips not only looks appealing but also invites the viewer to envision the satisfying crunch. Moreover, varying shapes plays a crucial role; incorporating a range of shapes keeps the viewer engaged, making your stack visually dynamic and enhancing the overall aesthetic of your photographs. By considering these factors, your ingredient selections will lead to captivating food stacks that stand out in any context, making your photography more impactful.
Best Practices for Choosing Fresh Produce
Choosing fresh produce is vital since the quality directly influences the final appearance of your food stack. Start by selecting items that maintain their shape well; for instance, overly ripe tomatoes may collapse, while firm ones will stack beautifully and maintain their integrity. Look for vibrancy in colour, as bright, fresh produce tends to photograph better, creating that eye-catching allure essential for stunning images that attract viewers.
When arranging your stack, be mindful of how different produce interacts in terms of moisture; watery items can lead to instability. For example, pairing juicy fruits with drier elements like nuts or crackers helps to maintain structural integrity and prevents the stack from collapsing. Additionally, consider the seasonality of produce; seasonal items are not only fresher and tastier but also more visually appealing. By adhering to these best practices, your food stacks will not only look fantastic but also taste delicious, enhancing the overall experience for your audience and elevating your food photography.
How does layering influence the overall design of your food stack?
Layering plays a critical role in the overall design of your food stack. Thoughtful layering generates depth and visual intrigue, transforming ordinary stacks into captivating focal points. Start by integrating elements seamlessly; alternate colours and textures to achieve a balanced appearance that invites exploration. For instance, layering smooth, creamy elements with crunchy textures enhances visual appeal and evokes a sense of variety that keeps the viewer engaged.
The height of each layer significantly affects aesthetics; strategically placing taller items can draw the eye upward, creating an inviting vertical composition that captivates attention. Consider the rhythm of the stack; larger items at the base provide stability, while smaller items add intrigue higher up, creating a dynamic yet balanced arrangement. By following these steps, your food stacks will not only be visually stunning but will also narrate a story through their arrangement, making them more engaging for those who view your photography and enhancing your artistic expression.
Expert Recommendations for Stacking Food to Achieve Stunning Photographs
What techniques do professionals suggest for effective stacking?
Professionals in the realm of food photography often utilise specific stacking methods that yield superior photo outcomes. One popular technique is the ‘layered pyramid' approach, where items are stacked to form a pyramid-like shape. This structured method not only ensures stability but also directs the viewer's attention to the peak of the stack, enhancing the focal point of the image and creating a visually compelling presentation.
Another effective method is the ‘interleave technique,' where ingredients are alternated to create an appealing visual flow. For example, alternating layers of colourful vegetables with creamy dips not only enhances aesthetics but also adds depth to the image, making it more dynamic. It’s essential to select items that can maintain their form; this consistency creates a uniform look while ensuring that the stack remains visually engaging. Professionals frequently advise photographers to step back and view their stack from various angles to assess balance and aesthetic appeal. By adopting these techniques, you can replicate professional results and significantly elevate your photography skills, creating images that resonate with your audience.
Advanced Composition Strategies for Creating Beautiful Food Stacks
Balancing elements within your stack is crucial for achieving a visually appealing composition. One advanced tip is the ‘rule of thirds’; divide your frame into a grid and position key elements along these lines or their intersections. This technique enhances depth and draws the viewer's eye naturally toward focal points within the stack, creating a more engaging composition.
Utilising negative space effectively also contributes to an appealing composition. By allowing breathing room around your stack, you create a sense of harmony, making the primary focus even more pronounced and inviting the viewer to appreciate the arrangement. Experiment with varying angles and framing techniques, such as shooting from slightly above or at eye level, to discover the most striking presentation of your stack. Additionally, consider the mood you want to convey; a dark background can make colours pop, while a light backdrop can create a fresh and airy feel. By incorporating these advanced tips, you’ll transform your food photography into a polished art form, ensuring your stacks are not only beautiful but also compelling and engaging for your audience.
How can you refine your unique food stacking style?
Refining your food stacking style involves personalising your approach based on expert guidance and insights. Start by identifying which aspects of your current stacking technique resonate with you and which elements you’d like to enhance for greater visual impact. For instance, if you notice your stacks lack height, consider incorporating taller items or using supports to elevate certain layers, thus adding dimension to your arrangements.
Experimentation is key; try out different combinations of ingredients, colours, and textures to determine what aligns with your aesthetic preferences and enhances your overall presentation. Document your progress through photographs, allowing you to compare and analyse improvements over time. Furthermore, seek feedback from peers or online communities focused on food photography; constructive criticism can provide valuable insights that foster growth. As you adapt your methods and embrace iterative improvements, your food stacking style will evolve, leading to consistent success in your photography efforts and a unique artistic expression.
What Essential Tools Are Necessary for Effective Food Stacking?
Basic Equipment Every Food Stacker Should Possess
To create stunning food stacks, certain basic equipment is essential. First and foremost, a variety of sturdy plates is crucial; different shapes and sizes allow for versatility in presentation, enabling you to adapt to various food items. Consider investing in shallow bowls or tiered platters, which can help elevate your food and add dimension to your stack, enhancing visual interest.
Additionally, having a selection of supports, such as cake stands or risers, can enhance visual appeal by introducing layers within your stack. Small items like toothpicks or skewers can also be beneficial for holding delicate layers together, preventing mishaps during the photography process. Moreover, good lighting is indispensable; natural light is ideal, but portable reflectors can assist in bouncing light onto your stack, enhancing the colours and textures within the arrangement. By assembling this basic toolkit, you'll be well-equipped to create captivating food stacks that photograph beautifully, making your images stand out.
How to Effectively Incorporate Props into Food Stacking?
Incorporating props effectively can add dimension and significantly improve the overall quality of your food photography. When selecting props, consider the theme and mood you wish to convey. For instance, rustic wooden boards can enhance a farmhouse aesthetic, while sleek marble surfaces contribute to a modern look that complements your food.
Start by choosing props that complement your food; if featuring a vibrant salad, earthy-toned bowls or utensils can provide a beautiful contrast without overpowering the main dish. Textiles, such as patterned napkins or tablecloths, can introduce colour and texture, creating layers that draw the viewer’s eye. Be mindful of the arrangement; props should support the main stack, guiding attention rather than distracting from it. By mastering the art of prop selection and placement, you can enhance the visual appeal of your photos while ensuring the food remains the star of the show, captivating your audience's attention.
Innovative Accessories for Enhanced Stacking Outcomes
To further elevate your food photography, consider incorporating innovative accessories that improve both stability and presentation. One useful addition is a stabiliser; these can be discreetly placed beneath layers to secure them while maintaining a clean aesthetic. Additionally, using clear acrylic risers allows for an airy feeling in your stack while providing necessary support, enhancing the overall presentation.
Investing in a high-quality tripod can also significantly enhance your photography results. Tripods ensure your camera remains steady, allowing for sharper images, especially in low-light conditions. Furthermore, consider using stylised serving utensils or decorative elements like fresh herbs as finishing touches that add flair and style. By integrating these innovative accessories into your food stacking process, you enhance both the creative and practical aspects of your photography, leading to professional-level results that impress your audience.
Research-Backed Advantages of Stacking Food for Eye-Catching Photos
What are the primary benefits of employing effective stacking techniques?
Utilising effective stacking techniques offers numerous key advantages, particularly regarding visual appeal. Expert analysis indicates that structured layers significantly boost photo engagement. A well-stacked arrangement captures attention more effortlessly, inviting viewers to explore the intricacies of the composition and appreciate the artistry involved.
Moreover, properly executed stacking enhances the perceived quality of the food, making it more appealing to potential consumers or Instagram followers. Stacked objects naturally draw the eye and encourage viewers to linger on the image longer, increasing the likelihood of interaction. This prolonged engagement can translate into increased likes and shares on social platforms. By focusing on effective stacking methods, you can leverage these advantages to create visually stunning images that resonate with a broader audience, enhancing your online presence.
How does stacking stimulate creativity in food photography?
Stacking food creatively fosters innovation in both presentation and arrangement. The process of layering ingredients allows photographers to experiment with different combinations, textures, and colours, promoting a more imaginative approach to food styling. By offering a framework for creativity, stacking encourages individuals to think outside the box and try unconventional pairings that might not typically be considered.
To harness this creativity, photographers can start with a basic stack and gradually introduce new elements or rearrange existing ones to explore different visual narratives. This experimentation leads to unique presentations that stand out in the saturated world of food photography. Additionally, the iterative nature of stacking allows for ongoing improvement, as each attempt can inform future efforts. By embracing stacking as a creative outlet, photographers can continually refine their skills and produce captivating images that resonate with their audience, establishing their unique artistic voice.
What long-term benefits can stacking have on photography skills?
Regular practice of food stacking techniques can lead to significant long-term benefits on your photography skills. As you consistently engage in stacking, you develop an intuitive understanding of composition, lighting, and visual balance. For instance, through repeated attempts, you may begin to anticipate which ingredients work well together or how to adjust props to create a more compelling arrangement that captivates viewers.
Real-world examples of progression often show that photographers who commit to honing their stacking skills experience greater confidence in their ability to capture visually stunning images. Over time, this dedication can result in more polished food photography, opening up opportunities for professional growth, such as collaborations or social media partnerships that elevate your profile.
Additionally, as you refine your stacking abilities, you develop a unique style that sets your work apart, enhancing your overall artistic expression and brand identity. By viewing stacking as a long-term investment in your photography skills, you position yourself for continual growth and improvement in your craft, ensuring that your photography remains fresh and engaging.
How does stacking contribute to enhancing social media engagement?
Effective food stacking plays a critical role in boosting social media engagement, particularly on platforms like Instagram. Studies indicate that visually appealing food images attract more likes, shares, and comments, enhancing visibility and interaction within your audience. Bold, well-stacked arrangements invite viewers to explore, leading to increased engagement rates and a stronger online presence, particularly in a competitive digital landscape.
Creating eye-catching stacks helps establish your identity as a food photographer, encouraging followers to return for more visually stunning content. The dynamics of social media thrive on engagement; therefore, by implementing effective stacking techniques, you enhance your potential to connect with a broader audience. This connection can lead to increased follower counts and opportunities for collaboration, ultimately helping you build a stronger online presence and attract more followers who appreciate your unique style and vision.
What advantages does stacking provide over other food arrangement methods?
When comparing stacking to alternative arrangement methods, several advantages become evident. Stacking often provides better visual balance and appeal, producing images that are not only aesthetically pleasing but also easier to achieve professional results with minimal effort. Unlike flat arrangements, stacking introduces a dynamic element that encourages the viewer's eye to travel through the image, making it more engaging and interactive, ultimately enhancing the viewing experience.
Research suggests that stacked presentations often lead to higher viewer retention rates, as the intricate layering invites closer examination and appreciation of the craftsmanship involved. This technique allows for greater creativity in composition, enabling photographers to experiment with diverse heights and textures while maintaining structural integrity. By emphasising the advantages of stacking, you position yourself to create images that not only stand out but also resonate with viewers on a deeper level, capturing their attention and sparking interest.
How to Capture the Perfect Stacked Photo?
What lighting techniques are most effective for food photography?
Optimal lighting techniques are vital for illuminating your food stacks effectively. Natural light is often regarded as the gold standard in food photography; it enhances the true colours and textures of your ingredients, making them more appetising and visually appealing. Position your stack near a window, using sheer curtains to diffuse harsh sunlight and create a soft, flattering glow that enhances the overall presentation.
If natural light isn't available, consider using softbox lights or LED panels to achieve a similar effect, ensuring your food is well-lit and inviting. When setting up your lighting, aim for a 45-degree angle to create shadows that add depth without overwhelming the subject. Reflectors can further enhance the light, bouncing it back onto the food for a more vibrant appearance that highlights the textures and colours. By mastering these lighting techniques, you ensure that your food stacks turn out with the vibrant colours and details that make for stunning photography, capturing the viewer's attention.
What angles are best for photographing stacked food?
The angle at which you photograph your food stack significantly influences the final image. A classic overhead shot, often referred to as a flat lay, is ideal for displaying intricate layers and arrangements. This perspective allows the viewer to appreciate the full composition without distractions, showcasing the careful design of your stack and the artistry involved in creating it.
Alternatively, a slight tilt or 45-degree angle can add dimension to your photograph, emphasising height and depth within the stack. This angle invites the viewer to engage more intimately with the image, offering a glimpse of the layers that might not be visible from directly above. Experimenting with both angles will reveal the most flattering perspectives for various types of stacks. By employing these strategies, you’ll create photographs that not only capture the beauty of your food arrangements but also engage and entice your audience, making your work stand out.
What steps should you follow to edit photos after stacking?
Post-capture enhancements can transform good food stacks into extraordinary visuals that truly stand out. Start with colour correction; utilising editing software like Adobe Lightroom or Photoshop can help amplify the vibrancy of your ingredients and ensure they look their best. Adjust the exposure to ensure that details are not lost in shadows or highlights, maintaining the integrity of the food's natural colours.
Furthermore, consider cropping your image to create a more balanced composition, focusing on the key elements of your stack that you want to highlight. Enhance contrast to bring out textures, making layers pop and increasing visual interest. Lastly, apply sharpening techniques to ensure details are crisp and clear. By mastering these editing techniques, you’ll elevate your food photography, achieving images that not only look professional but also invite admiration and engagement from viewers.
Tips for Perfecting Your Food Stacking Routine
What daily practices can help build your expertise in food stacking?
Building expertise in food stacking often requires consistent daily practice and dedication. Establish a routine that encourages you to engage regularly with your food photography. Dedicate specific time each day to experiment with stacking; this could involve testing new ingredient combinations, exploring different props, or trying out various lighting setups to enhance your skills and creativity.
Incorporating a feedback loop can also enhance your growth. Share your images with fellow photographers or on social media, inviting constructive criticism that can help refine your technique and elevate your work. Continuous practice will not only improve your stacking precision but also build your confidence in food styling. Emphasising these daily practices creates a strong foundation for long-term success in food photography, ensuring that you continually develop your skills and creativity.
How can feedback enhance your food stacking skills?
Receiving feedback on your food stacks can significantly elevate your photography skills and artistic development. Constructive criticism provides fresh perspectives on your work, highlighting areas for improvement that you might overlook. Engaging with online communities, attending workshops, or collaborating with peers can expose you to different techniques and styles that enhance your work.
Consider incorporating feedback into your practice by revisiting your stacking methods. If multiple people comment on the need for better composition, try experimenting with angles or layering techniques to improve your presentations. The iterative process of refining your stacks based on feedback will lead to more effective and visually striking food photography. Emphasising the value of collaboration enriches your learning experience, ultimately enhancing the quality of your images and helping you grow as a photographer.
What final adjustments should you make before photographing your food stack?
- Check alignment of layers to ensure visual harmony.
- Clean the stack by removing any spills or smudges.
- Ensure the stability of all components for a flawless presentation.
- Assess colour balance to maintain overall aesthetic appeal.
- Review the height of layers for optimal visual interest.
- Adjust props or background elements to enhance focus on the stack.
- Evaluate the lighting setup to ensure even illumination.
Making final adjustments before capturing your food stack can significantly impact photo quality and viewer perception. A quick alignment check ensures harmony within the layers, while tidying up any spills can elevate the overall presentation. Additionally, assessing colour balance and the height of layers can enhance visual intrigue, ensuring your stack stands out in your photographs and captures attention.
Evaluating the props and background elements also plays a crucial role; adjustments here can direct attention to the food rather than distractions. Finally, reviewing your lighting setup ensures that the stack is illuminated evenly, highlighting the textures and colours that make your arrangement appealing. By implementing these final adjustments, you enhance the professionalism of your food photography, ensuring your images are captivating and inviting.
How can you overcome common challenges in food stacking?
Food stacking often presents common challenges, such as uneven surfaces or item slippage that can undermine your efforts. Addressing these issues requires practical strategies for successful arrangements. If you find yourself working on an uneven surface, consider using a cutting board or flat platter as a stable base, ensuring a level foundation for your stack that supports your creative vision.
To tackle item slippage, secure delicate layers with toothpicks or food-safe adhesives that keep them in place during photography. Additionally, selecting ingredients that naturally support one another can mitigate this challenge. For instance, using items that nestle together, like cookies and cream, can create a more stable stack that enhances overall presentation. If challenges arise during the stacking process, approach them methodically; reassess your arrangement and consider adjusting the height or components to maintain stability. By proactively addressing these common issues, you ensure a flawless stacking routine that enhances the precision and success of your food photography, allowing your creativity to shine.
Frequently Asked Questions about Food Stacking
What are the best ingredients for stacking food effectively?
The best ingredients for stacking are those that maintain their shape and provide contrasting colours and textures. Fruits, sturdy vegetables, and grain-based items typically work well together to create visually appealing arrangements that captivate the eye and enhance the overall presentation.
How can I quickly improve my food stacking skills?
To quickly enhance your food stacking skills, practice daily, experiment with various ingredients, and seek feedback from others. Regularly reviewing your work will also help you identify areas for improvement and refine your technique, contributing to your ongoing development.
What lighting conditions are ideal for food photography?
Natural light is ideal for food photography, as it enhances the vibrancy of colours and textures, making them more appealing to viewers. If natural light is unavailable, soft artificial lighting can also work well to create a similar effect that showcases your food stacks beautifully.
How can I ensure my food stack remains stable during photography?
To keep your food stack stable, build a strong base with heavier items and use supports like toothpicks for delicate layers. Ensure that all items are securely placed and balanced to prevent them from tipping over during the photography process, maintaining the integrity of your composition.
What types of props should I use for food stacking?
Choose props that complement your food stack, such as textured fabrics, wooden boards, or stylish utensils. The goal is to enhance the presentation without distracting attention away from the main dish, allowing the food to shine while enhancing the overall aesthetic.
How do I choose the right angle for photographing my food stack?
Experiment with different angles to find the most flattering perspective for your food stack. Overhead shots work well for showcasing layers and arrangements, while a slight tilt can add depth and engage the viewer's eye more intimately, creating a more compelling image.
What common mistakes should I avoid when stacking food?
Common mistakes include uneven layers, overloading stacks with too many items, ignoring colour contrast, and failing to clean up spills. Avoiding these pitfalls will help you create more appealing and professional-looking arrangements that capture attention effectively.
How can I effectively edit my food photography?
Editing food photography effectively involves adjusting colour balance, exposure, and sharpness. Use tools like Adobe Lightroom or Photoshop to enhance the vibrancy and clarity of your images, ensuring they attract attention and resonate with viewers.
Are there specific techniques recommended by professional food photographers?
Professionals often recommend the layered pyramid method for stacking, as well as the interleave technique, where ingredients are alternated to create a visually appealing and engaging composition that draws the viewer in and enhances overall presentation.
How often should I practice my food stacking skills?
Practicing your food stacking skills daily or several times a week is ideal for building expertise. Regular practice will help you refine your technique and develop confidence in your food photography abilities, enhancing your overall creative expression.
Join our community on Facebook!
The post How to Stack Food for Stunning Photos: Essential Tips appeared first on https://cookinggods.com
The Article Stack Food for Stunning Photos: Essential Tips to Succeed Was Found On https://limitsofstrategy.com
The Article Stack Food for Stunning Photos: Key Tips for Success found first on https://electroquench.com