Unlocking the Secrets to Creating the Perfect Pavlova Meringue
Embarking on a culinary adventure to uncover the essential techniques for crafting a perfect pavlova meringue begins with a comprehensive understanding of the key ingredients that form the foundation of this cherished dessert. The careful selection of each element not only enhances the overall flavour but also ensures a remarkable texture that will amaze your guests and showcase your baking skills. Each ingredient plays a crucial role, working harmoniously to create the traditional pavlova, which is characterised by its crisp outer shell and soft, marshmallow-like centre. Familiarising yourself with these indispensable components is a vital step on your journey to mastering this classic dessert.
Recognising the Vital Role of Egg Whites in Achieving Meringue Perfection
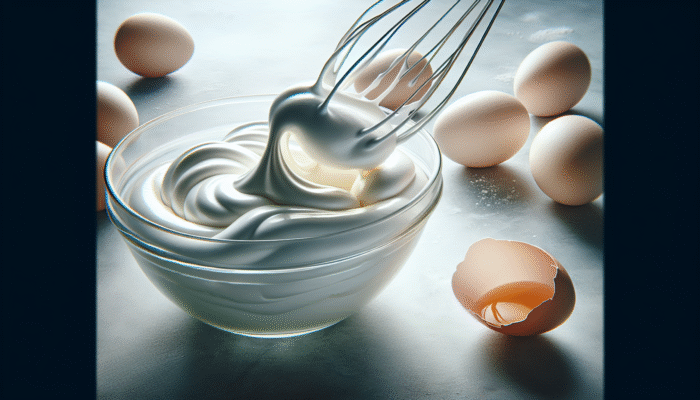
The foundation of any successful meringue lies undeniably in the egg whites. To achieve maximum volume and stability, it is essential to use fresh, room-temperature egg whites. Fresh eggs possess a stronger protein structure, allowing the whites to whip to a greater volume and maintain their shape more effectively than older eggs can. By allowing egg whites to reach room temperature, you facilitate easier whipping, resulting in a light and airy mixture that is crucial for the success of your pavlova. This simple step can transform your meringue from mediocre to extraordinary.
For optimal results with your egg whites, meticulous separation is essential. It is imperative to prevent any yolk contamination, as even the tiniest trace of fat can severely hinder the whipping process. Using a glass or metal bowl is advisable for this task, as plastic bowls can often retain oils that disrupt the aeration process. Once your egg whites are prepared, begin whipping them at a low speed, gradually increasing to medium until soft peaks form. This careful method allows for the smooth incorporation of air, setting the stage for your essential techniques for crafting a perfect pavlova meringue.
Selecting the Ideal Sugar for a Flawless Meringue Texture
The selection of sugar is just as important as that of the egg whites when it comes to achieving a perfect meringue. Fine caster sugar is the best choice, as it dissolves more readily during the beating process, ensuring a smooth and consistent texture throughout your meringue. Gradually adding sugar to the whipped whites and allowing each addition to dissolve completely before incorporating more is a critical step; overlooking this can result in a grainy meringue that lacks the silky finish essential for a pavlova. The right sugar makes all the difference in your final product.
The balance of sweetness is vital—not only does sugar provide sweetness, but it also plays a crucial role in stabilising the meringue structure. It aids in reinforcing the whipped egg whites, ensuring they maintain their shape during the baking process. Aim for a sugar-to-egg white ratio of approximately two parts sugar to one part egg white for an optimal mixture, although this may vary depending on the size of your eggs. This careful consideration in sugar selection and incorporation forms an essential element in the essential techniques for crafting a perfect pavlova meringue.
Incorporating an Acid Component for Enhanced Meringue Stability
Introducing a splash of acid, such as vinegar or lemon juice, is a clever strategy for achieving your meringue goals. This ingredient serves to stabilise the egg whites, ensuring they retain their volume and structure even post-baking. The acidity from vinegar or lemon juice also imparts a subtle tang to the meringue, enriching its overall flavour profile and complexity, making each bite a delightful experience.
When adding your acidic component, only a small quantity is required—approximately a teaspoon for the eggs from three to four large eggs should suffice. This seemingly minor addition can significantly impact the ultimate outcome of your pavlova. It represents a straightforward yet effective tip within the realm of essential techniques for crafting a perfect pavlova meringue.
Boosting Meringue Stability with Cornflour
Cornflour, commonly referred to as cornstarch, is an essential addition to your pavlova mixture. By incorporating just a small amount, you enhance the stability and structure of your meringue, ensuring a crisp outer shell while maintaining a soft and chewy interior. This unique texture distinguishes a pavlova from other meringue-based desserts, making it a truly remarkable treat that will impress anyone lucky enough to sample it.
To integrate cornflour into your meringue, gently fold it into the mixture just before baking. This technique preserves the lightness of the egg whites while providing crucial structural support. It’s a simple addition that can have a tremendous impact on your final product, bringing you closer to mastering the essential techniques for crafting a perfect pavlova meringue.
Developing Expert Preparation Skills for Pavlova Mastery
After gathering your ingredients, the next critical phase in your pavlova creation is preparation. Refining the techniques involved in crafting a successful meringue will distinguish you as a truly skilled baker. With meticulous attention to detail, you can ensure that your pavlova achieves the perfect texture and stability, resulting in an unforgettable dessert experience that is sure to impress your guests and leave them wanting more.
Ensuring Immaculate Equipment for Flawless Meringue Creation
The cleanliness of your equipment is paramount for producing a flawless meringue. Your mixing bowl and whisk must be entirely clean and dry, as any residual fat or grease can disrupt the aeration of the egg whites. It’s advisable to avoid plastic bowls, which may retain oils and negatively impact the outcome. Instead, opt for glass or metal to maintain the purity of your mixture and ensure the best possible results.
Before you begin, consider giving your bowl a quick wipe with a lemon wedge or a paper towel soaked in vinegar. This straightforward step can help eliminate any lingering oils and prepare your bowl for the task ahead. With your bowl and whisk primed for action, you can confidently embark on the journey of perfecting your pavlova, fully equipped with the knowledge of one of the essential key techniques for creating an exquisite pavlova meringue.
Precision in the Beating Process for Optimal Egg Whites
When it comes to beating your egg whites, patience and precision are vital. Start at a low speed to allow air to gently integrate into the whites. This gradual approach prevents splattering and lays a stable foundation for your meringue. As soft peaks begin to form, you can progressively increase the speed to high, ensuring that the egg whites are whipped to their full potential.
Continue beating until the whites reach stiff peaks, which should stand tall and retain their shape when the whisk is lifted. This process may take several minutes, so it’s important not to rush; allow the egg whites to develop their full potential. Achieving the right consistency is one of the core essential techniques for crafting a perfect pavlova meringue.
Maintaining Ideal Temperature Control for Successful Baking
Baking is as much about precision as it is about creativity. A low baking temperature is critical for the success of pavlova, allowing the meringue to dry out gradually without cracking. Set your oven to approximately 100°C (212°F) and ensure it is fully preheated before placing your pavlova inside. This guarantees an even cooking process throughout, which is crucial for achieving that perfect finish.
Be mindful of your oven’s unique characteristics; if it tends to run hot, you may need to adjust your temperature slightly lower. Keeping the door closed during baking is essential for preserving temperature stability, as opening the oven can introduce sudden fluctuations that may lead to cracks. Perfecting your baking technique is yet another of the essential techniques for crafting a perfect pavlova meringue that will enhance your dessert-making prowess.
Choosing Premium Ingredients for Meringue Success
Selecting high-quality ingredients is fundamental to the success of your meringue. Always opt for fresh, room-temperature eggs, as they will whip up the best. The same goes for sugar—fine caster sugar is ideal for achieving that silky-smooth texture essential for pavlova.
Additionally, consider investing in high-quality vinegar or fresh lemons for your acidic component. These ingredients not only improve the stability of your meringue but also enrich the overall flavour profile. When it comes to pavlova, every detail matters, and using premium ingredients is one of the essential key techniques for creating an exquisite pavlova meringue.
Allowing Resting Time for Optimal Meringue Development
Before baking, allow your piped meringues to rest at room temperature for approximately 30 minutes. This often-overlooked step is crucial for developing a skin on the meringue. The skin creates a barrier that helps prevent cracking during the baking process, ensuring that your pavlova maintains its stunning shape and texture.
During this resting period, the outer layer of the meringue begins to dry out, preparing it for the gentle heat of the oven. This simple yet effective technique is an invaluable part of the essential techniques for crafting a perfect pavlova meringue, guaranteeing an impressive final product that will leave anyone fortunate enough to indulge in a slice in awe.
Shaping Your Meringue for Maximum Visual Appeal
As you delve deeper into the art of pavlova, the shaping of your meringue becomes a vital step. The way you pipe and form your meringue not only influences the aesthetics of your dessert but also affects its texture and stability. A beautifully shaped pavlova can elevate your dining experience, transforming a simple dessert into a stunning centrepiece that captures attention and admiration.
Employing Effective Piping Techniques for a Stunning Presentation
The piping technique you employ when shaping your meringue is crucial for the final presentation of your dessert. Begin with a piping bag fitted with a large round tip to create a clean base. Pipe a circle onto your baking paper to serve as a guide for your meringue’s shape, ensuring a consistent and elegant form.
As you pipe the meringue, apply gentle pressure and move in a circular motion, building up the sides to achieve a well-defined shape. Keep in mind that the height of your pavlova will impact the cooking time, so aim for a reasonably uniform height. With practice, you will discover that your piping skills can significantly contribute to mastering the essential techniques for crafting a perfect pavlova meringue.
Smoothing the Surface for a Polished Finish
After piping, gently smooth the top of your meringue with a spatula or the back of a spoon. This step is essential for achieving an even bake and a professional appearance. An even surface not only enhances visual appeal but also ensures that the meringue cooks uniformly, preventing any undercooked areas.
While aiming for a smooth surface, don’t hesitate to create a few decorative swirls or peaks. These details will caramelise beautifully during baking, adding character and charm to your pavlova’s appearance. Treat this shaping process as an opportunity for artistic expression and a vital aspect of the essential techniques for crafting a perfect pavlova meringue.
Creating a Well for Delicious Toppings
To enhance your pavlova’s ability to hold toppings, form a well in the centre of your piped meringue. Utilise the back of a spoon or your finger to create a slight indentation, ensuring it is deep enough to accommodate a generous amount of whipped cream and fruit without overflowing.
This well is not only functional—it also adds an appealing visual element to your pavlova, inviting your guests to indulge in its delicious offerings. By meticulously crafting this detail, you’re incorporating yet another of the essential techniques for crafting a perfect pavlova meringue that will set your creation apart from others.
Achieving Baking Perfection for Your Pavlova
As your beautifully shaped meringue awaits its turn in the oven, the next critical phase involves baking. The baking process can either make or break your pavlova, so understanding the nuances of your oven and how to manage it is crucial for revealing the essential techniques for crafting a perfect pavlova meringue.
The Significance of Thoroughly Preheating Your Oven
Never underestimate the importance of a fully preheated oven. Before considering placing your pavlova inside, ensure that the oven has reached the desired temperature. This guarantees that the meringue begins cooking evenly from the moment it enters, laying the groundwork for the perfect dessert.
A well-preheated oven allows the exterior to develop a crisp crust while the interior remains soft and chewy. If your oven tends to run cold or hot, consider investing in an oven thermometer to ensure accuracy. Mastering this aspect of baking is one of the profound essential techniques for crafting a perfect pavlova meringue that everyone should become familiar with.
Implementing an Effective Cooling Process
Once the baking process is complete, resist the urge to open the oven door immediately. Instead, turn off the heat and allow the pavlova to cool inside. This gradual cooling method helps prevent any sudden temperature changes that could lead to cracks and imperfections, ensuring your pavlova maintains its exquisite shape.
Allow the pavlova to rest in the oven for at least an hour or until it has completely cooled. This technique ensures that your pavlova retains its stunning shape and texture, solidifying your reputation as a true master of the essential techniques for crafting a perfect pavlova meringue.
Assessing Doneness for a Perfectly Baked Meringue
How can you determine when your pavlova is ready? A perfectly baked meringue should feel crisp on the outside while remaining slightly soft on the inside. Gently lift it off the baking tray; it should come away easily without sticking. If your meringue feels overly soft or sticky, it likely requires additional time in the oven.
Once you have mastered this judgment call, you’ll find it becomes second nature. Each pavlova will stand as a testament to your understanding of the essential techniques for crafting a perfect pavlova meringue, showcasing your skills and impressing anyone fortunate enough to taste your creation.
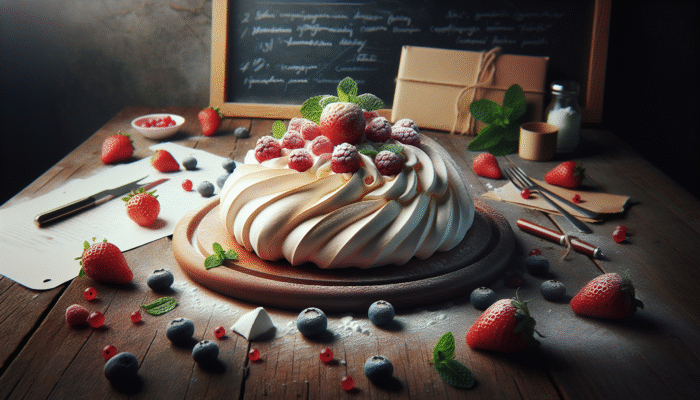
Artfully Topping and Presenting Your Pavlova
The final act in your pavlova creation involves the toppings and presentation. This is where you can fully unleash your creative spirit, transforming your pavlova into an exquisite masterpiece. The right toppings not only enhance the flavours but also elevate the overall visual appeal, making it a true showstopper at any gathering.
Incorporating Whipped Cream for a Luxurious Finish
What would a pavlova be without a generous layer of whipped cream? Begin by whipping fresh cream to soft peaks, ensuring it is not overbeaten—otherwise, you risk turning it into butter. The cream contributes a rich, creamy layer that beautifully complements the lightness of the meringue, enhancing every bite.
Spread the whipped cream generously over the cooled meringue, allowing it to nestle into the well you created earlier. This step is where you can truly explore different textures; utilise a spatula to create peaks or swirls for added dimension. Your choice of cream is pivotal, with options such as vanilla-infused or even coconut cream for a tropical flair that elevates your dessert experience.
Utilising Fresh Fruits for a Burst of Vibrant Flavours
Fresh fruits serve as the crowning jewels of your pavlova. Select a vibrant mix of seasonal fruits to create a stunning contrast in both colour and flavour. Berries, kiwi, and passionfruit are popular choices that not only enhance visual appeal but also provide a delightful burst of sweetness and tang that harmonises beautifully with the meringue and cream.
Artfully arrange your fruits on top of the whipped cream, allowing them to cascade over the edges for an inviting presentation. The interplay of flavours—sweet, tart, and creamy—creates a harmonious experience for the palate, rendering your pavlova truly unforgettable. This careful selection and arrangement of toppings is an essential aspect of the essential techniques for crafting a perfect pavlova meringue.
Adding Finishing Touches for Enhanced Elegance
After adorning your pavlova with cream and fruits, consider adding a few finishing touches to elevate its elegance. Edible flowers can introduce a whimsical touch and vibrant colour, transforming your dessert into a work of art that will captivate your guests. A light dusting of icing sugar provides a beautiful contrast and a hint of sweetness that enhances the overall look.
For an additional touch of luxury, consider drizzling some passionfruit pulp or a fruit coulis over the top. These garnishes not only enrich the visual appeal but also contribute additional layers of flavour. The final presentation of your pavlova can make all the difference, showcasing your skills and understanding of the essential techniques for crafting a perfect pavlova meringue.
Troubleshooting Common Pavlova Challenges for Successful Outcomes
Even the most experienced bakers encounter challenges when it comes to creating pavlova. Understanding how to troubleshoot common issues will assist you in refining your technique and ensuring that each pavlova you produce is a resounding success, impressing your audience with your baking expertise.
Preventing Cracks in Your Pavlova: Effective Strategies
Cracking is perhaps the most prevalent issue encountered when baking pavlova. To avoid this unsightly problem, it is essential to steer clear of sudden temperature changes during baking. Maintaining a steady, low temperature allows the meringue to dry out evenly, significantly reducing the likelihood of cracks forming.
Additionally, ensuring that your sugar dissolves completely during the mixing phase can enhance the structural integrity of your meringue. Any undissolved sugar can lead to weak spots, which may ultimately result in cracking. By taking these precautions, you can greatly diminish the chances of dealing with cracks in your pavlova, thereby mastering one of the vital essential techniques for crafting a perfect pavlova meringue.
Addressing Weeping in Your Meringue for Enhanced Stability
Weeping occurs when moisture seeps from the meringue, creating a soggy mess beneath your cream and fruit toppings. To combat this issue, pay close attention to the ratio of sugar to egg whites. Achieving the ideal balance is crucial for ensuring that your meringue remains stable and can withstand the weight of toppings without collapsing.
Baking at a low temperature also plays a significant role in preventing weeping. A gentle drying process allows the meringue to set properly without releasing excess moisture. If you consistently experience weeping in your pavlovas, adjusting your sugar ratio and baking temperature can lead to substantial improvements in your results, ensuring a flawless presentation.
Preventing Deflation of Your Meringue: Essential Recommendations
Experiencing deflation in your meringue can be disheartening, especially after dedicating time and effort to whipping the egg whites to perfection. To avoid this common pitfall, be cautious about how you incorporate the sugar into the egg whites. Overbeating after the sugar has been added can lead to a collapse in structure that is difficult to rectify.
Ensure that each addition of sugar is fully dissolved before increasing the speed of your mixer. This simple step forms a crucial part of the essential techniques for crafting a perfect pavlova meringue, ensuring that your pavlova holds its beautiful shape throughout both the baking and serving processes.
Frequently Asked Questions About Perfecting Pavlova
Can I prepare pavlova in advance without compromising its quality?
Yes, pavlova can be made ahead of time. Simply bake and cool it, then store it in an airtight container at room temperature for up to two days prior to serving. Top it with cream and fruit just before serving to maintain freshness and texture, ensuring it wows your guests.
What can I use as a substitute for caster sugar in my pavlova?
If caster sugar is unavailable, you can use granulated sugar as a substitute. Just ensure to blend it in a food processor to achieve a finer texture that will dissolve better in your meringue mixture, ensuring a smooth consistency.
Why is my pavlova sticky when I serve it?
A sticky pavlova often indicates that it hasn’t been baked long enough or that the oven temperature was set too high. Ensure to bake at a low temperature and allow ample cooling time to achieve the ideal texture and consistency, resulting in a pavlova that is delightful and not overly moist.
Is it possible to freeze pavlova without affecting its quality?
Pavlova can be frozen, but it’s best to do so without any toppings. Wrap it securely in plastic wrap and store it in the freezer. Thaw it in the fridge before serving for the best results and preservation of texture, ensuring it remains light and airy.
Which fruits are ideal for topping my pavlova?
Seasonal fruits such as berries, kiwi, and passionfruit are excellent choices for pavlova. They add vibrant colours and contrasting flavours that beautifully complement the meringue and cream, enhancing the overall dessert experience and making it visually appealing.
What causes my pavlova to collapse unexpectedly?
A collapse can occur if the egg whites were under-whipped or if the sugar wasn’t fully dissolved during mixing. Ensure that your meringue reaches stiff peaks and that sugar is incorporated gradually for the best results and structural integrity.
How can I prevent my pavlova from cracking during baking?
To prevent cracking, maintain a low baking temperature, avoid sudden temperature fluctuations, and ensure that the sugar is fully dissolved during the mixing process to enhance stability and promote a successful bake.
What is the ideal baking temperature for a successful pavlova?
The ideal temperature for baking pavlova is around 100°C (212°F). This low temperature ensures even cooking and helps develop a crisp exterior while maintaining a soft interior, creating the perfect texture that everyone will love.
How long should I allow my pavlova to cool after baking?
Allow your pavlova to cool in the oven for at least an hour following baking. This gradual cooling process helps prevent cracking and ensures the desired texture is achieved for a perfect presentation that will impress your guests.
Is pavlova a gluten-free dessert option?
Yes, pavlova is inherently gluten-free as it is primarily made from egg whites and sugar, making it a delightful option for individuals with gluten sensitivities or dietary restrictions, allowing everyone to enjoy this exquisite dessert.
Join our community on Facebook for more baking tips!
The post Secrets to a Perfect Pavlova Meringue: Master the Art appeared first on Cooking Gods.
The Article Perfect Pavlova Meringue: Master the Secrets to Success Was Found On https://limitsofstrategy.com
The Article Pavlova Meringue Mastery: Unlock the Secrets to Perfection found first on https://electroquench.com